About Me

My photo
Paonia, CO, United States
I have discovered that life is a roller coaster and I'm learning to enjoy the ride! I am a married mom of 4. I work part-time outside of the home and, of course, more that full time as a wife and mother! I do classes from my craft room in the basement...which is why we call it the "Craft Cave."

Sunday, June 26, 2011

Scripture sympathy...


We all have need for sympathy cards every now and then. I try to make a few ahead so I have one when I need it. Here are some samples of the latest I've been able to get done.

They are all pretty similar... just changed up the background paper a bit and the scripture saying. Easy, but still created distinct cards!


The scripture sayings are from Our Daily Bread Designs. (Love their stuff!) And the Tree and leaves used in the background are TAC stamps.

Saturday, June 25, 2011

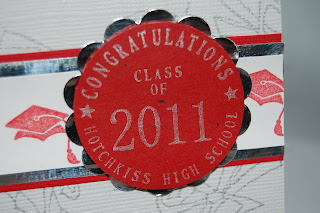
Grad cards


Here are a couple of the grad cards I did a while back.
I really like the JustRite stampers for this kind of thing. It really makes it personal!
This is just a very basic card sketch that is versatile and easy, but still creates effective and stunning cards. Love it!


Cause to Rejoice....


...it's your birthday!

Do you think it's "manly" enough? I used this for my Father-in-law.

For this card I used the Heiroglyph Horses, Script background, and Amberly Grace paper & coordinating cardstock from TAC. I also used a retired set Bookoo Blessings for the saying on the outside and Just Because on the inside.

The pocket for the gift card is the library pocket die by Papertrey Ink.


It all came together well, don't you think?

A Grand Bouquet

I haven't actually decided what I want to use this card for yet. So, the inside remains.... blank.

But looky how wonderful the colors blend in with the background paper!! Fortuitious circumstance for sure!


I have decided it's probably much easier to coordinate colors of paper and pens before coloring the image, but so far I've been pretty lucky to have it all work out anyway!


This is made with the discontinued stamp Grand Bouquet

Serenading the moon

Yes... it's another discontinued stamp from TAC. But really... I loved the image then, and I still do...

So, why not use it? To me the artwork is very whimsical but not too cutesy.

I used the nestabilities for the main image, more Basic Grey paper from a 6x6 pad, and plain white cardstock with decorative edge punches.

Sending you sunshine


This stamp is just like T-3330 Hello Day from TAC but was a limited edition in a smaller size a while back. Doesn't make it any less cute! It reminds me of little girls playing "dress up."


This was an image that I stamped a few off and then colored in. Thank goodness I have a bunch of the 6x6 Basic Grey paper pads and found this paper to coordinate!

Mini Envelope Album for the folks

My In-laws recently came for a visit. Little did they know they would be roped into helping us get the tile backsplash done in our kitchen! So, I put together this little book as a Thank you for all their help. And... since they didn't get to see the completed project... yet.


This great idea came from my friend Julie. It was a project we did at one of her Stamping Get-Togethers a couple years ago. This uses one 6 x 9 manila envelope and one 4 1/2 x 6 invitation envelope. I used one of the TAC paper packs because it blended well with my photos and with the golden color of the manila envelope. Plus I had plenty of tags for journaling and tabs for the photo pulls. The ribbon on the left side is the binding that holds the envelopes together. It closes like a book and when put together has 2 pockets perfect for adding more pictures.


Inside I added several pictures of the progress we made in our recent kitchen upgrade.


As you can see in the binding, the ribbon is put through 2 holes in the envelopes to put this together.


Here the second photo shows how I added additional photos to the inside envelope on a piece of cardstock with a pull-out tab.


Then, as you turn the page (or the inner envelope) you have 2 more surfaces to scrap plus the pocket created by the manila envelope too!


Another piece of cardstock and a tab for a couple more photos and that makes it project complete!


Melody's Shower


My sorority recently had a baby shower for one of our sisters. I had to do the invites, of course! I love doing that stuff... So here it is! I used some retired TAC stamps and a new die from Papertrey Ink. Love it! Makes those cute little windows oh-so-easy!


Here's the card we gave with the sorority gift featuring another retired TAC stamp and another Papertrey Ink die. Simple, but still elegant.


Lastly, the card I made to accompany my little gift. I totally stamp-lifted this idea from someone out there in internet land but I don't recall who it was (sorry!) but thank you for the inspiration!

Tuesday, June 21, 2011

Theo... in colors!


If you know me, you know I have a fondness for cats. Yes, yes I do.

Theo the cat from TAC is quite a looker, isn't he?

And oh so fun to color! I haven't been brave enough to make him crazy colors yet, like blue or lavender, but I may give it a try on my next project.

Today he is normal cat color. But I did give the chair a splash of color.

Is it easier to color the image and then find paper to match or select the paper first? What are your thoughts on this creative process?

Here's an image of the completed card. Cute, huh? I love the Basic Grey 6x6 paper pads! Perfect for cardmakers!


That creative edge is a Papertrey Ink die cut. Love it!


And here's another take on the same theme!


Which one is YOUR favorite? What can I say, I like them both!


Here's hoping you are all having an EXCELLENT day!


Father's Day 2011


Here are some cards I did for Father's Day this year.
I have to say, it feels good to be back in my craft room actually crafting again!
My health is doing much better and I anticipate begin able to do more and plan some classes for the fall.


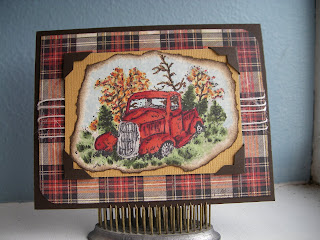
This is done with a retired stamp from TAC and colored with copic markers. I am really loving those! The more I use them, the more I like them!

This card was for my father-in-law as he owns a similar vehicle.


Here's a card I did for my daddy! We treated him well for Father's Day. Brunch with all the fixin's and a prime rib roast dinner. (That put a smile on his face!) There's not too much you can get for a guy who already has everything, you know?

He seemed to like his card though! The ducks are another retired TAC stamp and again... colored with copic markers. The decorative paper is TAC on dark brown cardstock. The edges were done with the TAC edgers stamp in versamark and then covered with Pearl Ex (yeah, remember that stuff?) It gave the card just the right touch.


Finally, the card I created for my DH. This lovely scene was created from Stampscape stamps (tree, mountains, clouds with sun) and TAC (elk) but it all came together pretty well, if I do say so myself! I like how this one turned out!

Again, colored with the copic markers. LOVE them!


So... what do you think?

Friday, June 17, 2011

Hello Friend...

Lately I've taken to trying to stamp off a bunch of images to color and then make the cards later. So far I have lots of images, and very few cards. Here's one I actually managed to complete!

It's an interesting challenge to match papers and cardstock to an image I've already colored. That's when the Basic Grey 6x6 pads are sure helpful. I've found some excellent matches. But I do wonder if maybe I'm not doing this backwards.


Here's the finished card. What do you think?

Thursday, June 16, 2011

Where I've been... (mostly not crafting related)

Although I did get treats done for Dom's school friends for Valentine's Day... I forgot to get the photos, so I couldn't post that. Sorry!
It seems since then I've been working on our kitchen mini re-do, or upgrade, if you will. And since I did get some photos of that, I'll share!
These are the before. See that strip of green behind the stove? Yes, my whole kitchen and great room were that color when we moved in. That was the first thing we changed.... the color. I like natural tones so the walls became Classic Taupe in the kitchen, and further into the great room we used the same above the chair rail, and Cliff Rock below.


The black countertops were not my choice either and eventually they just HAD to go! So, of course, we upgraded to granite. LOVE it! We were able to select our own slabs and lay out the pattern. We got the best features of the natural stone included in our counters. There's a beautiful rust, black, quartz vein that runs through the island. Totally AWESOME!!


And you all know, with nice granite counter tops, we had to go with a tile backsplash. We used the natural Cabo tiles and I do like the way it looks with our granite. This is also the crafty part of the post. Check out that lovely decor feature above the stove. Carl and I designed and created that ourselves! We used some leftover scraps from our countertops and used those as the mountains so it all ties together! We priced some designs similar to this one, and let me tell you, they were PRICEY! So, I'm glad that my DH could figure out how to do this ourselves for a fraction the cost of a specialty piece.


We have lots of natural lighting in our great room from both North and South windows, and I thought it was amazing how much the room brightened up with the paint. Well... I was mistaken. Once we got those black countertops out and the granite in... we now have a beautifully naturally lit great room. What a difference! It's like a complete transformation! And I LOVE it!