About Me

My photo
Paonia, CO, United States
I have discovered that life is a roller coaster and I'm learning to enjoy the ride! I am a married mom of 4. I work part-time outside of the home and, of course, more that full time as a wife and mother! I do classes from my craft room in the basement...which is why we call it the "Craft Cave."

Wednesday, December 23, 2009

Last minute Christmas Gifts...

It just wasn't my idea...

but when a friend needs help, I'm always on board.
So, Candy brought me this project and wanted to make more for Christmas gifts.


We've been having SO much fun. My craft room is an absolute disaster!


Lookie!!!
Are these just COOLEST PICTURE FRAMES YOU'VE EVER SEEN????
Well, I like 'em anyway!! Perfect for a 4 x 6 photo right from the camera!

Sunday, November 8, 2009

Sneak Peek #1

Here are some peeks at a few of the cards we will make at the Stamp-a-Stack this weekend!!
I hope you are excited! It will be LOADS of FUN!!


Reservations are filling quickly! Call me now to reserve your spot!!
Thanks!

Tuesday, November 3, 2009

4th Annual Stamp-a-Stack Update

Due to several requests, I have decided to continue with the Annual Christmas Stamp-a-Stack this year.

Saturday, November 14, 2009 11:00 till ??
Memorial Hall in Hotchkiss.

RESERVATIONS MUST BE MADE BY NOVEMBER 10th!!!
This special event is limited to 20 people, so please, reserve your spot NOW!!
It is not an easy task to prepare supplies for this event especially since my help and time are limited at best anymore.

Make 20 Christmas/Holiday themed cards from 10 available designs for $25
(or free with a $50 purchase from TAC)
Snacks will be available, but if you would like to bring something to share, it would be appreciated!
Remember, everyone who attends will get a prize!

Watch the blog for "sneak peeks"

Sunday, October 4, 2009

Witch Hat Candy Treat Tutorial

Supplies:
cutter
large and small circle coluzzle & foam mat
coluzzle swivel knife
decorator bag
black & white cardstock
8" black 3/8" ribbon
stamps & acrylic mount
ink (Noir & Orangerie shown here)
1 3/4" circle punch
1 1/2" circle punch
Not shown:
scissors
adhesive
1/8" punch
mounting foam
candy
Jar or glass

Directions:
1. Cut decorator bag down to 6" from tip.


2. Cut 1/2" slits about a quarter inch apart across the bottom (or open end) of the decorator bag.


3. Cut 2 circles from the black cardstock. (Iused the large circle coluzzle, 4th from the center. This will give you circles about 4" in diameter.)


4. On one of the circles, center the small coluzzle and cut a smaller circle out of the center. (Once again I used the fourth from the center, approximately a 2 inch diameter.)


5. Apply adhesive to one side of this circle with the cut out.


6. Open the decorator bag and one small section at a time, pulling the bag into the center of the circle, adhere the bag to the hat brim. (Hopefully you can understand what I mean from the picture. I used a jar to sort of hold or balance the bag while I did this.)
After you have the bag attached to the adhesive, you will need to apply adhesive over the bag that is attached to the brim of the hat. (You can use the edge of the jar to help with this.)
Fill up the bag with candy! Be careful not to get your candy stuck to the adhesive on the brim of the hat. (It also helps if you overfill the bag just a bit as the candy tends to settle after you turn it over.)

7. Attach the other circle and seal.


8. Turn your hat right side up!


9. Stamp your decorative element!
I used T- 3009 Glitter Goblins.
I stamped the image twice.


I punched the center out with the 1 1/2" punch and then inked the edges with Orangerie.


and then punched the base of my element out with the 1 3/4" punch.


I punched a small 1/8" hole for the ribbon at the bottom of my image and added some mounting foam and the center piece attached here.


Run both ends of the ribbon through the hole...


loop over the hat, tighten your ribbon and tie a decortive knot.


oooo! Almost done!


To make the spider charm to put on the tip of your hat you will need:
clear "shrinky dink" plastic
Staz-On ink
stamps (TAC-2600 Trick or Treat "retired" set used here)
1/4" hole punch
1/16" hole punch
thread
heat gun
heating surface (Iused a tile)
bamboo skewer (to hold the plastic while it melts)
a wood block (to flatten your shrinky dink, if needed)

Directions:

Stamp the spider and the saying on the plastic. (I stamped the spider on one side and the saying on the other.)
Punch out your image (1 1/2" circle used here)


Punch a 1/4" hole in your charm BEFORE YOU MELT IT.


Use a skewer to hold your image while you heat it. Remember the plastic will shrivel up as you heat it.


Thread some string through the hole on your shrinky dink charm.


Punch a 1/16" hole in the top of the decorator bag you used to make the witch hat. Thread your charm on and tie a knot.


Now you're done!!


Feel free to leave a comment if you have any questions!


Tuesday, September 29, 2009

DC fold out book


Many, many moons ago.... (okay, it's only been three years) our family took a trip to Washington
D.C. And now, finally, after all my good intentions to get these done the fall we came home, I'm finally going to finish these fold-out memory books for the kids.
This is my big plan for Saturday which I will be spending at the Scrappy Moose Retreat in Delta. It's their 1st Anniversary and the grand opening of their scrapping retreat!
Okay, enough about me...

Here are the details of the project...which is the real reason you peruse this blog, isn't it?
I used three 10" chipboard squares and seven "coordinating" pieces of 12" decorative paper.

The chipboard was cut as follows:
One left intact, as the back and base of the book.
The center pieces are cut in half to two 5x10 rectangles.
The top, or front cover is cut into one 7x10 and one 3x10 piece.
I'd provide the dimensions of the paper, but honestly, I didn't really keep track, exactly... but, I'll do my best here...
A: 8x11 for the large half of the front cover
B: 6.875 x 9.875 and 2.875 x 9.875 to cover the inside flaps of the front cover pieces on both sides
C: 6x11 for one of the inside flaps and 4x10 for the other side of the front cover flap.
D: two pieces 4.875 x 9.875 to cover the inside flaps.
E: One piece 6 x 11 for the other inside flap & to cover the chipboard letters on the front cover.
F: 9.875 x9.875 to cover the inside of the back cover
G: 11" square for the back cover.

The large pieces were wrapped around the chipboard (miter your corners) and the smaller pieces adhered the the "inside."


Sorry if that's not too clear.
I used eyelets and twine to create the bindings and tags leftover from paper packs that seemed to coordinate with my paper colors for my journaling.
I'm hoping to get all four of these done this weekend.
Please leave me a comment (which I love to read) if you need clarification on any of the instructions.
Have a great day and I wish you better success with your good intentions than I seem to experiece with mine, at least, more often than I'd care to admit!


...Oh! For you interested parties, and because you asked for it...
I'll get the directions for the witch hat posted soon! .... Stay tuned!


Sunday, September 27, 2009

Treats for your Tricksters, Goodies for your Goblins

I spend a lot of time perusing the internet looking for fabulous ideas that I can use with stamps and supplies I already own. Especially now when more people are trying to save a buck rather than spend a buck. If you don't absolutely LOVE a stamp set, or can't justify it's usability, it's just not worth spending the money for it.

I just can't afford to always get the great new stuff. Maybe that is the reason why I don't get rid of my discontinued stamps. You know, the ones they don't carry in the catalog anymore? I know, as a demonstrator I'm supposed to push *NEW* stuff, but, that just doesn't always work with a particular project I'd like to create. So, I reach for my retired stamps frequently. Sometimes it takes the combination of new and used sets to get the final piece I really want. Most stamp sets just don't come with a great combination of images and sayings. (The big advantage with the creative cling backing on TAC's real rubber stamps is the minimal amount of storage space which enables me to be able to keep such a huge inventory of personal stamps!)


Monday night we will be making some treat ideas for our little goblins.
Hmmm..... but I found such great ideas, I had a difficult time deciding which ones to do....
Should we do something new?
Like this cute pumpkin basket? (I added the cute label on the handle ...with retired stamps.)


Or maybe this cute witch hat with a shrinky-dink spider charm? (a combination of current and retired stamps)


We could always stick with the tried and true favorites...

...a sour cream container (current stamp set)


...or maybe an M&M matchbook (current stamps)


...or a mini candy bar pull (current and retired)


...or a pixie stick pack (current and retired)


...or a candy corn envelope (new stamp, old EKSuccess punches)


We will be doing at least three of these on Monday, but which will they be?
See you at 7!

Thursday, September 10, 2009

Back to School

I love the smell of freshly sharpened pencils. It has always meant Autumn to me, and "back to school" time.

I like to send a small gift to the homeroom teachers the kids will be working with this year. Since those cute small backpacks have been making the rounds on the stamping blogs, I thought this would be a great idea. I put small "Teacher Survival Kits" inside each one. I used one of TAC's retired sets to create a school related background.


Sunday, September 6, 2009

I'm back! with LOTS of news!!

Yes, I've been a BAD blogger. But really, when people say, "Family First," do you think they mean it? Well, my life this summer has been all about putting family and family needs first. I did plan a few classes, which were very poorly attended ....or not attended at all. So, needless to say, I didn't really have much to post. Also, I started a new job in June too. Although it's supposed to be "part-time," at 30 hours a week and working till 6 p.m. it may as well be the full-time job it feels like! But, I must say, I really love my job, even if it has limited my time for my creative outlet.
So, the BIG news it that, after 13 years with TAC, I was actually asked to submit some samples for the stamp of the Month for September.
You can check out the ones TAC liked here.

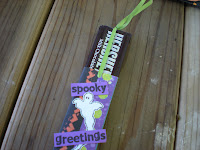
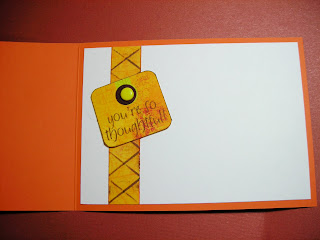
And below are the samples they did not include on their website:
(The first two show outside and inside the card.....)


(So, sometimes, even when I use the preview tool, my pics and text come out kind of weird looking. Sorry about that!)


Here's the last bit of news.....CLASS INFO!!

Tech Tuesdays will continue the first Tuesday of the month. (I will just have to be better organized and of course, have better cooperation from my family.)

So, those dates are:
Oct. 6, November 3, and December 1 all at 7:00 p.m. Come & learn 2 techniques and make an instruction card for your book and a sample greeting card for only $5.


Monday, Sept. 28. Halloween Treats & goodies. 7:00 p.m. $10
Make 3 spooky treats for your special goblins!


Thursday, October 22. Matchbox Advent Calendar. $25
Most of you have seen the candy box.... this one is even bigger!!


Monday, November 30. Calendars. $20
Make 3 calendars, just in time for gift giving for the new year.


Monday, December 14. Frame it up $20
Just in time for those last minute gifts! A great way to display photos is always an aprreciated present!


All classes listed above are limited to 10 people. Reservation must be made at least 3 days prior to class.


Also, mark the date for the 4th Annual Christmas Stamp-a-Stack

Saturday, November 14 (time & location to be announced later)

Now, just keep in mind.... class dates may change due to school scheduling....
postcards are going out this week!


and one last photo.....
the reason I've been so busy this summer, and the big reason I went back to work...
Rebecca started at Pacific University in Forest Grove, OR this fall. Here she is on the beach.....